Venatra Starting Guide
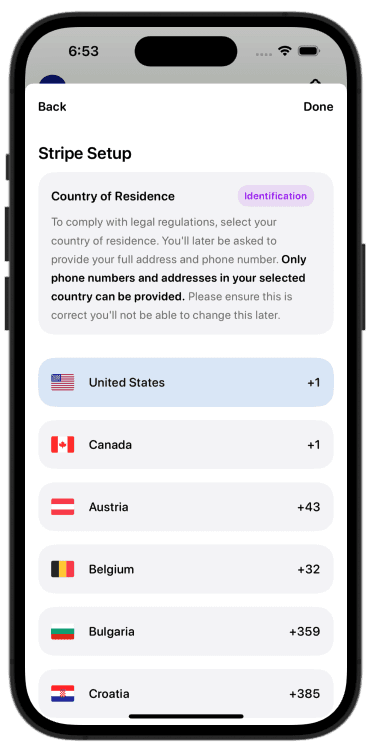
Welcome to Venatra, not sure where to start? No problem we'll show you how you can quickly get started. The first thing you need to do is setup your Stripe account, but first, ensure that you live in one of these supported countries.
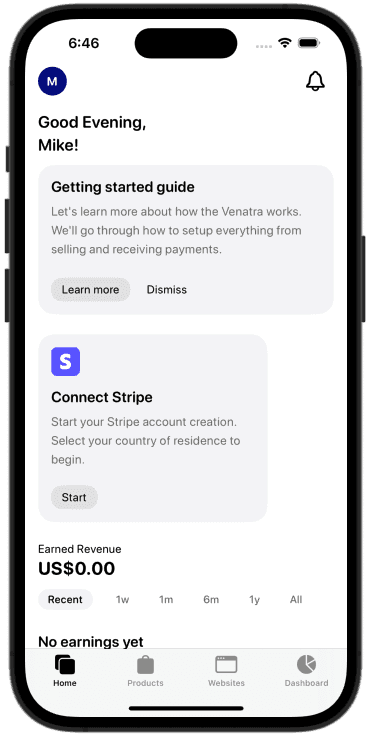
After creating your account, your screen should look something like this. Click on the start button for the connect stripe section.
Next step, choose your country of residence, ensure that you have a valid address and a phone number with the same international area code. You can confirm that this information is accurate after selection. You can edit by clicking change country, after you press continue, you can not edit this information.

How do you plan to use Venatra? As an individual or using a registered company. You can pick either one but you must submit identification to verify whatever choice you make. If you pick a company, you must provide document to support that you own this company or can act on behalf of it. If you select individual, you just need to submit identification to ensure you're a real person and comply with regulatory requirements.
If you selected individual as a business type, you must provide identification. This includes your name, home address, email and phone number. Stripe may also require you to provide a document to verify this. Ensure the name and information you provide is present on a valid piece of identification like your driver's license or passport.


You may be required to provide documents to verify your ID. Ensure you verify your identity within a certain time frame of creating your Stripe account. You'll receive email alerts and reminders to do so.
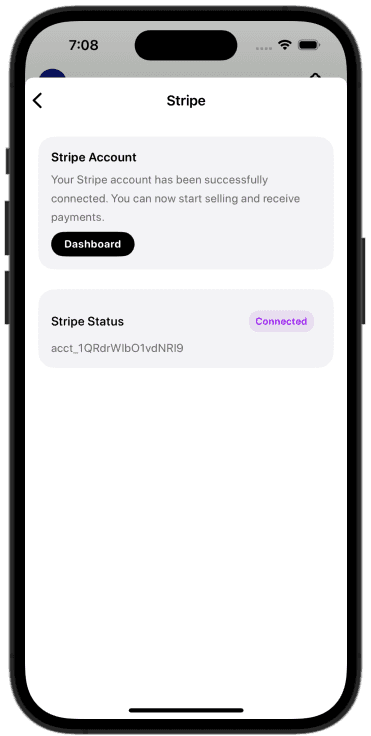
You can always check the status of your Stripe account by clicking the action button in the Stripe section of the home page. If you have successfully complete the account registration, the Stripe section will be gone from the Home page. In that case you can access your Stripe account by going to Profile -> Stripe Account.